This G Suite email migration guide applies to anyone trying to migrate information (emails, contacts, calendar & Google Drive data) for many use cases, some of the most used ones are outlined below –
- Migrate Email to G Suite
- Migrate Email to Google Apps
- Migrate Email from G Suite
- Migrate Email from Google Apps
- Migrate Google Drive to G Suite
- Migrate Google Calendar to another Google account
- Migrate Contacts from Gmail or Google Apps to G Suite
Find information faster on this Google Apps migration guide with these page jumps –
Common Scenarios That Require G Suite & Google Apps Email Migrations & data migrations
Pre-requisites For G Suite Email Migration & Google Apps Migration
Steps for G Suite Email Migration & Google Apps Migration
How to Migrate Google Calendar to another Google account
How to Migrate Contacts to G Suite
Steps to Migrate Google Drive to G Suite
Google does not (at present) have a seamless process for users or organizations that are setup as sub-organizations on a legacy Google Apps or G Suite account to be moved to a separate/their own individual G Suite accounts. An example of this would be an organization with multiple domains on a single legacy Google Apps or G Suite account wanting to segregate their accounts and migrate email to G Suite.
This scenario would also arise in the case of a legacy Google Apps service provider selling space on his or her legacy Google Apps account to many different organizations (completely against every Google TOS) where users of sub-organizations may not have super admin access to the account – this can be achieved by adding multiple domains as secondary/domain aliases.
If you’re not a super admin on a legacy Google Apps or G Suite account and are unsure of whether a service provider or reseller (so called) is giving you legacy Google Apps vs G Suite, the simplest way to find out is to check how much storage space you have available on an individual domain email account.
If you get assigned 15GB/account then you’re on legacy Google Apps, 30GB/account is G Suite. You can login to any email account on the domain and check at the bottom left hand corner for this information.

You can also click the manage link and follow the link to verify that 15GB/30GB is listed under “Provided by your domain”.
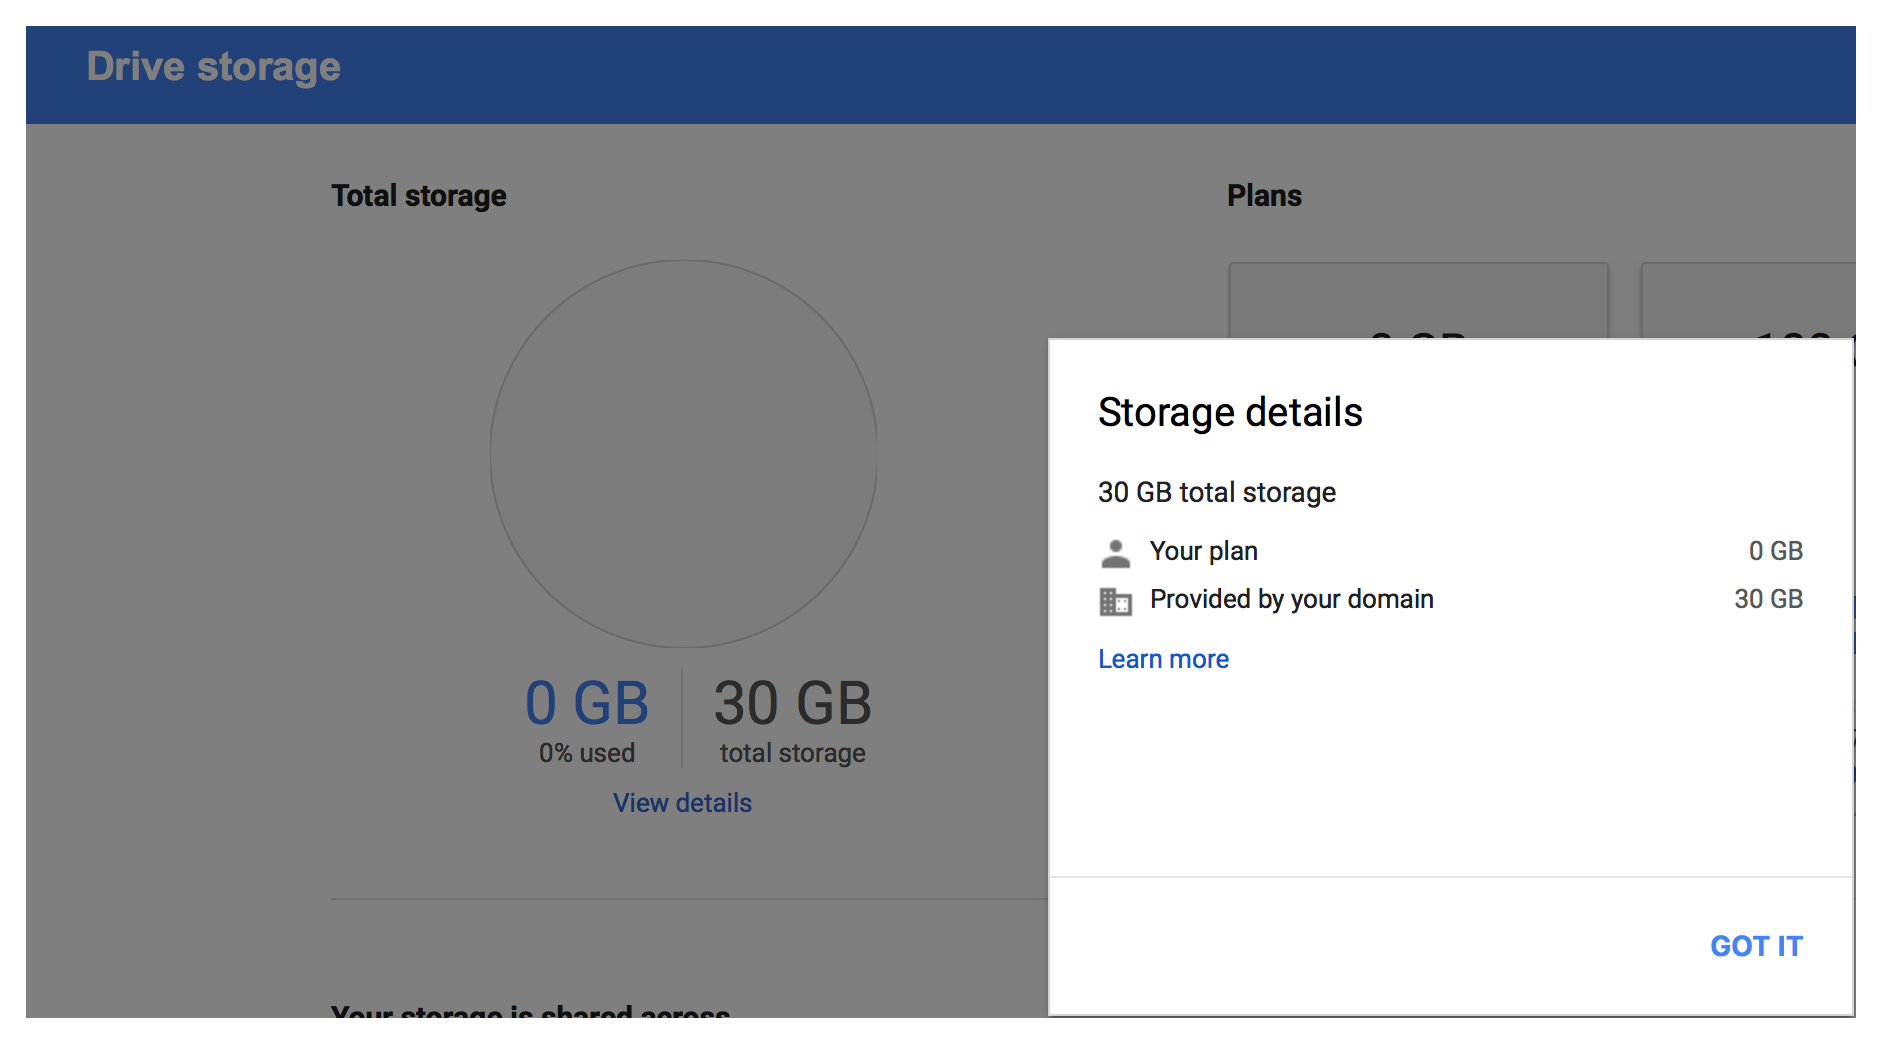
If Google provided a way for sub-organzations to simply be removed from one account and moved to another, it would make this process so much easier, but who likes easy right?
As someone who recently helped migrate information on accounts from legacy Google Apps to G Suite, I figured I should post the steps I undertook for anyone who faces the same use case scenario as a reference point. I didn’t have super admin access on the legacy Google Apps account so it took me a lot of extra steps to get this done, having super admin access would definitely reduce a lot of the work. There are many paid tools available online that help with the migration process but the majority require super admin access. Again, this guide is for a Google Apps email migration to G Suite. It can also help to migrate email from one Google Apps account to another as the process is identical.
For the purposes of this post, I shall be referring to the legacy Google Apps account as source account and the new temporary domain where the accounts will be setup as destination account.
G Suite Account Migrations for Organizations Generally Involve 4 Main Categories of User Data that Require Migrating
- Google Email
- Google Calendar
- Google Contacts
- Google Drive Data
Google has provided a fairly easy way to check these 4 items off your list for the migration to successfully take place but before we can get into the actual migration, we need to set a few things straight by completing a series of tasks.
- Purchase an extra/temporary domain (if you don’t already have an unused one lying around) – The name can be anything as long as it’s not already being used for email purposes (whether with Google mail or another mail provider). I setup all my domains with CloudFlare Nameservers as a matter of practice for ease of administration and management, feel free to do the same.
- Create a new G Suite account on this temporary (destination) domain, verify the domain with Google and setup MX entries.
- Re-create all user accounts on this G Suite account – For instance if you have 20 accounts on the source domain, create the exact same 20 user account names on this destination domain. As part of this step, I also reset the passwords for all users on the source domain and set the same passwords on the destination accounts. I had access to a “User Management Admin” account on the source domain which helped with this step.
Here’s the rationale behind setting up a temporary domain with G Suite –
- Migrate all the data from the source user accounts (email, contacts, etc) to the corresponding destination user accounts
- Delete the original domain from the other legacy Google Apps/G Suite account
- Add the original domain to this new G Suite account (add as secondary domain)
- Rename all the users on this new G Suite account back to the original domain (it is as simple as renaming [email protected] to [email protected])
- Delete the temporary domain from the newly created G Suite account
CloudFlare Related –
As part of adding CloudFlare to your newly purchased domain, I would advise you to add your original domain (source) to CloudFlare as well (if it’s not already on CloudFlare) along with the MX entries for G Suite (plus any other required DNS entries) and change the NS to the CloudFlare assigned NS. If you do this correctly, you will experience little to no email downtime when you finally make the switch when you delete the original domain from legacy Google Apps and add it to your new G Suite account. As part of the verification step for re-adding the source domain to the newly created G Suite account (after all the migrations are completed), you will need to add a TXT DNS entry to the original domain (unless you choose a different verification method with Google).
Let’s begin with G Suite email migration as it normally takes the longest time to get this done as hundreds, thousands or potentially even tens of thousands of emails must be copied across servers on the cloud (the process could take several days, sometimes even longer depending on how many emails, attachments, etc are being migrated). This process is for a Google Apps migration to G Suite.
A few things need to be kept in mind/sorted out before email migration from the source email accounts to the destination email accounts can be started.
- Under mail settings on each individual email account (source and destination), make sure IMAP is enabled and under labels “Show in IMAP” is enabled for all labels you want migrated to the new accounts, in my experience “Chats” are turned off by default.
- Also ensure that every individual account (again source and destination) has “Enable access to less secure apps” turned on. As a super admin, you can enforce “Enable access to less secure apps” for all users under the Security tab, at least on the new G Suite account with the temporary (destination) domain if not on the source account.
In my use case with 40 user accounts, 20 at source and 20 at destination, I turned on “IMAP” and “Enable access to less secure apps” for all user accounts.
If you’ve reached this far, I’m assuming you’ve already setup the new G Suite account. Follow the steps to migrate email to G Suite.
To proceed, login to the admin console of this new G Suite account (admin.google.com) and select the “Data migration” tab. If you don’t see it, look under “More Controls”.
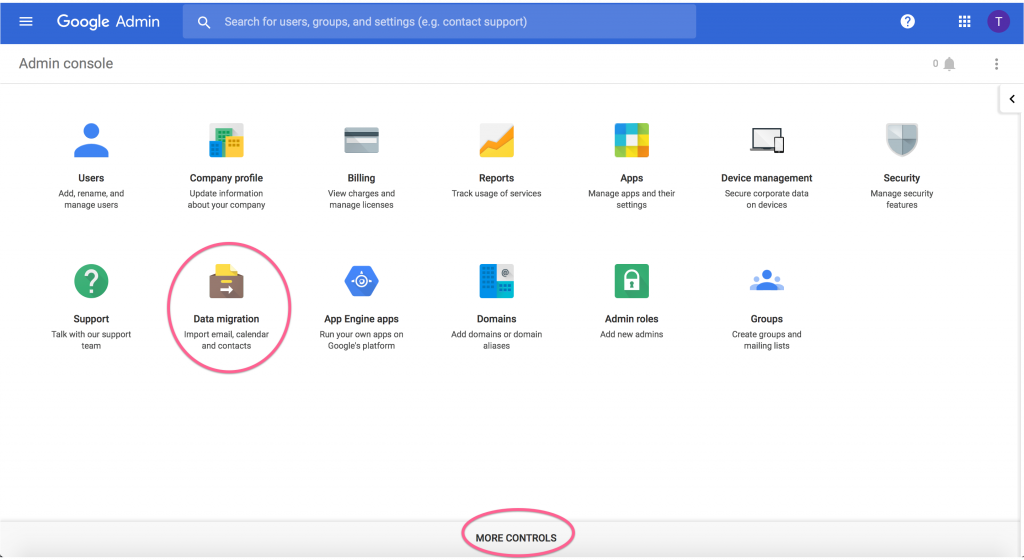
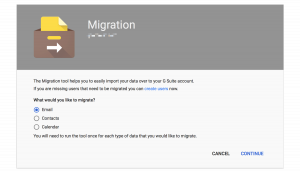
Next up, choose “Email”.
On the next page, select “G Suite” as migration source, let the Connection protocol remain set at “Auto select” and enter the Role account details. The role account is ideally the super admin account for your source domain account. These email migration settings pertain to your legacy Google Apps account to commence Google Apps migration to G Suite. If you don’t have super admin access (as was the case with me), just enter the details of any email account on the source domain and hit connect.
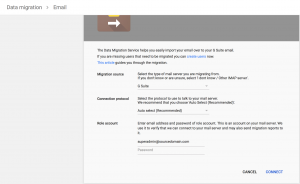
After Google establishes a connection to this role account, you can choose the email migration settings (date starting when emails should begin to be migrated, whether you want junk/deleted mails to be migrated). After this, you can setup and start the accounts for email migration. Google provides a format on how to upload the information for multiple users as a CSV so you don’t have to enter the information manually for every user account one at a time. Creating this CSV is useful, especially as you will perform this email migration step multiple times as part of your delta migration after the first bulk email migration has been completed.
As I didn’t have super admin access to the legacy Google Apps account, I resorted to resetting all user account passwords on the source domain so I could use that login information on the next migration window as part of the CSV/individual login information inputs. I believe connecting a super admin account at the source domain allows you to select individual users from the source domain that you wish to perform email migrations on thereby bypassing the need to have individual login information on all the source users accounts (please correct me if I’m wrong in this assumption).
Let the G Suite email migration do its thing over the next few days/weeks. If an individual email account migration percentage status appears to be stuck at 99%, don’t worry as it’s due to labels updating; just patiently wait it out.
Something I learned during the process – When I compared the number of emails on source vs destination email accounts, I noticed a discrepancy in email count numbers and I re-did the bulk migration thinking something went wrong. The number count did not change by much (except the incremental email number count increase between the first and second migrations) and I still had to account for a number count difference of 400 emails between source and destination accounts. It took me a while to figure out what the issue was, turns out the migration hadn’t missed any emails at all. The numbers not tallying up was due to “conversation view” being enabled on the destination email account. Turning “conversation view” to off got the numbers to match up. This setting is found under General settings in Mail.
Calendar
As Google does not have a way to automatically migrate calendars/calendar events from one G Suite account to another, you will be forced to do this manually for every user account and this is the best way on how to migrate Google calendar to another Google account. You can give your users access to their newly created G Suite accounts on the temporary domain and have them move it themselves if you feel they can manage this independently.
Either way, here are the steps –
1. Export calendar from Google Calendar: https://support.google.com/calendar/answer/37111?hl=en
2. Import calendar to Google Calendar: https://support.google.com/calendar/answer/37118?hl=en titled Import events to Google Calendar.
Contacts
Same thing to do here, export from source account and import to destination account.
You can use the same steps to migrate contacts from Gmail to G Suite. Steps for export and import are both listed here for Google Contacts – https://support.google.com/mail/answer/1069522?hl=en
Google Drive
It’s super easy to migrate Google Drive to G Suite.
For this to work correctly, all your individual users will have to organize/reorganize their Google Drive accounts into folders. The following series of steps need to be completed for every individual account on the source domain, whether by an IT admin or the users individually. You can complete this step without the help of individual account users but having users organize their work into folders themselves will greatly reduce the possibility of missing out individual files , plus who doesn’t like organized folders!
- Visit drive.google.com – Be sure to be logged in from the source domain account
- Click the “Shared with me” tab. If anything worth saving is found here, select the item/items and click the “Add to my Drive” icon.
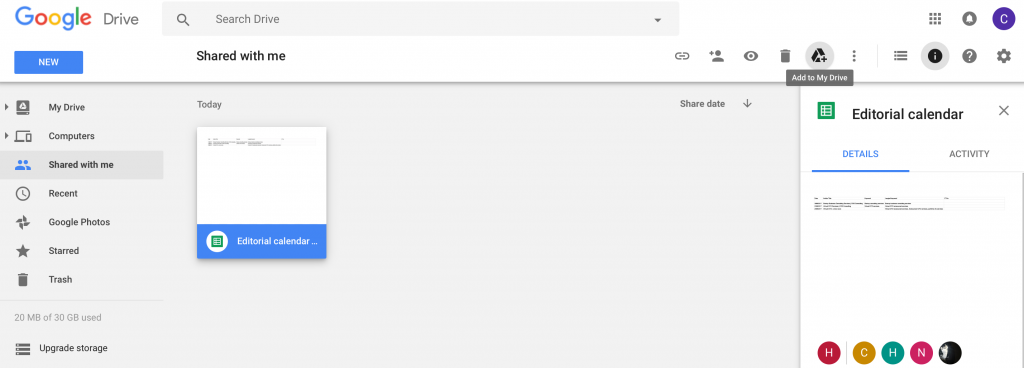
This saves a local copy of the file/files to your Google Drive folder.
- Click the “My Drive” tab and sort your data into folders.
- Share the folder/folders to your account on the new (destination) domain. For instance, [email protected] will share the folder with [email protected].
- Login to your account on the destination domain, open Google Drive and go to the “Shared with me” tab. Now select all the folders shared with this account (by the source domain accounts) and click the “Add to my Drive” icon to save a local copy of the files on the destination domain account.
IT admins can help with this process but it will be the users who will have to sort/organize their Google Drive data into folders.
Conclusion
This concludes the steps required to migrate email, calendar, contacts and Google Drive data from source to destination user accounts.
In the days leading up to the final switch over, I did a series of delta migrations for the emails to ensure no last day emails were lost during the migration process.
For organizations that use other Google services on their Google accounts such as AdWords, Analytics, Search Console, etc, be sure to make a different account (ideally an account outside both the source and destination domains) as admin/owner on a temporary basis and then change the admin/owner access back to the original account after the migration process has been completed.
G Suite/Google Apps administrators would be best suited to assess the ability of the individual users on the domain in regards to whether they can complete any/all of the tasks such as export/import of contacts/calendars, reorganization of Google Drive contents, sharing the folder/folders with destination domain accounts, saving a local copy of the previously shared data on destination domain accounts, etc for the migration to be completed in a successfully and timely manner. If individual users would not be best suited to performing the actions, it would fall to the migration specialist to ensure that any/all of the data is exported/imported from the source/destination accounts for the migration process.
Google informed me that there may be up to a 24 hour period for their system to be completely purged of the original domain from the legacy Google Apps account during which I may not be able to re-add it to the new G Suite account and that I may be hit with email downtime during that period to set my expectations straight. As a result, I scheduled the domain deletion for a Saturday evening (7PM) to minimize email loss just in case of the 24 hour email downtime that Google had warned me against.
After the domain was deleted from the legacy Google Apps account, I was able to re-add it to my (new) G Suite account almost instantaneously. Be sure to add the domain as a secondary domain under the Domains tab on Google Admin console. It took me a few minutes to re-add and verify the original domain with the new G Suite account. Next up is renaming all the 20 user accounts from @destinationdomain.com to @sourcedomain.com. You can also delete the domain alias for the destination (temporary) domain during this step from all the individual user accounts (this automatically gets created when you rename the users). I tested out sending and receiving emails on the source email accounts right after the renaming process and found emails flowing through perfectly. Thereafter I switched the primary and secondary domains (the destination domain was originally set as primary), deleted the test domain alias (as the destination domain was set with the test alias) and finally deleted the temporary domain from the G Suite account.
I am proud to report that I was hit with no email downtime, no lost emails and no data loss of any kind.
If you have any questions, tips or tricks for G Suite email migration or Google Apps migration, comment below and let others know.
If you need a hand to migrate legacy Google Apps to G Suite or G Suite email migrations, don’t be shy to reach out.
Leave a Reply